Wednesday, December 30, 2009

Chimney on-the-way

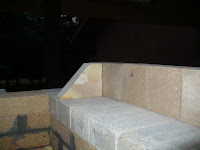
Eight rows were mortared today - using the big ladder. There is a shelf on the ladder where the hinge is - and it is big enough for the bucket of mortar. This made building up the rows of bricks manageable.

I am watering down the little bit of mortar remaining - I hope it will last til just below the roof. Actually, there is no reason to use the full thickness of the mortar - I'm just trying to keep the bricks in place from heat & earthquakes. I've been thinning out the buckets of mortar for quite awhile, it is way too thick to work with. Even though I was told by the manufaxturer the mortar is "trowel ready", I wonder if that is for instances when there is a 1/2" or so of mortar between the bricks.
Anyway, it will take more arm muscle to raise the bricks to mortar them as I get closer to the roof.

I'm not sure what I will use to reach to place bricks above the roof. A scaffold was suggested to me, but I don't know that I can reach over the edge of the roof to reach the chimney even with that. It seems to me that a "cherry picker" lift would be the thing to use. I wonder how much one of those costs to rent for a day?

Saturday, December 26, 2009

No More Corbeling In


The left pic is the ledge in the chimney that supports the two dampers as they slide in & out from each side.

On the lower left is the same ledge with newspaper on a damper shelf to catch any stray mortar that would obstruct the free sliding of the dampers. As the chimney gets built up higher, I will not be able to see or clear the sliding ledge of debris. When all the chimney bricks are mortared, the shelf supporting the newspaper will be removed and the newspaper will fall to be burned when the kiln is fired up.

The upper center photo has 3 rows of chimney bricks laid out in the order they will be mortared. On the left side of that pic is the last chimney row that is corbelled in, and is also the top row in the right side photo. I found I needed to see & measure these 3 rows of bricks to know just how much to adjust the indent on the last corbel rows. From now on, every chimney row laid above those on the right photo will be 7 bricks each, until above the roof, when the rain guard is finally reached.

Today, I started using the taller ladder in the right photo. It is not going to last many more rows. I'll have to find a taller ladder - and it cannot be an extension ladder (that would lean on the chimney)! I'm also on the last 25% of the latest bucket of mortar. It seems to be a slim to zero chance that I have enough mortar to finish this project. I really want to mortar some rows of soft bricks around the bottom of the chimney. I wonder if my local brick supplier took my suggestion to purchase mortar from a particular in-state NorthWest manufacturer, rather than shipping it in from the mid-West at nearly triple the price.

Wednesday, December 23, 2009

More Chimney Bricks


You can see the chimney is getting higher. The close-up on the left shows the split bricks for the dampers' row. In the row below the dampers, the front & back chimney rows of bricks are moved in 1/2" to support the damper shelves. Of course, I forgot to indent the bricks on that row until I had finished mortaring them. So I had to get a chisel and move the bricks in. This is when the cool weather comes in handy: it was cold enough that the mortar had not set & I was able to move the bricks without too much trouble. I'm now within a few rows of no more corbeling - hoorah!

Tuesday, December 22, 2009

Corbeling the Chimney

Yesterday I was back at mortaring bricks. It is going faster now, as there are fewer bricks in each row.
The lime green level marks as far as I am now. I am within 3 rows of where the dampers will go. Will get to it later today when it warms up to 40 degrees.
My mother-in-law in Southern California thinks that anything below 50 degrees is freezing. Here in Oregon, I walk outdoors in all weather, but prefer to wait until further above freezing to play with bricks & mortar.

It feels good to get back to playing in the 'mud' after taking most of last week off. The light-at-the-end-of-the-tunnel is getting brighter, now. Stay tuned.

Tuesday, December 15, 2009

Mortaring Again

Saturday, Dec 11 was a beautiful comparatively warm day - 40 degrees! Compared to the sub-freezing weather we had the week before, it is downright balmy.

I couldn't resist mixing up my last bucket of mortar, and getting a few more bricks in the chimney. After 3 rows, I was advised that it really isn't that warm and maybe I shouldn't do too many rows before I knew that the mortar was adhering.

Ok, I reluctantly quit while the sun was still out - as we near the shortest day of daylight of the year.

Then it only took a couple of days before the rain started in. Oh well, what did I think? It is winter. I have more time to make more pots...

Saturday, December 12, 2009

Kiln Door

I've been making pots this week, as we had sub-zero weather, and it was too cold to mortar bricks.

Last Monday, when the air may have risen to the 20's degrees, I cut off the screw tips sticking out from the front of the angle-iron door. It was much easier than I had anticipated, took only 15 minutes. But the screws may have been frozen, and the friction of the spinning grinder may have just shocked the screw tips off. So much for the amateur explanation.

The rest of the week, I was back making pots. It felt so-o-o good. Like riding a bike, my hands didn't forget what to do with clay on the wheel-head. I'm still slow, I think some of my speed is a result of the weather. Just how fast can one move in 15 degrees? Even inside the studio, it seemed to take forever to warm the place up. With the heater blaring, pots were drying out faster than usual for Oregon's usual cool damp winter. More typical is that pots take 3 weeks to completely dry out in the wintertime. Summer is much different, and spring & fall still different. One year I was making pots in Nevada. In that extremely dry air, one could almost put handles on mugs as fast as they were thrown, they dried out so quickly.

I'm closer to on schedule that when the kiln is finished, there will be pots ready to be fired in it. Except that the schedule is 3 months behind.
Hey, the sun is coming out, and it is above freezing. Wonder if it is warm enough to lay some mortar?

Saturday, December 5, 2009

Kiln Door


Photo on the right is the kiln door laying down. If you look carefully at the left photo, you can see screws coming through the brown angle iron.

Last week, 24 holes were drilled around the edge of the door, through the angle iron. Today, I laid the sheet metal inside the angle iron & drilled through both metals. Then the sheet metal screws that I had salvaged from my old kiln were inserted from the inside of the door, and ratcheted through the angle iron. It was suggested to me to grind the ends of the sheet metal screws off using the same grinder I used to clean hard bricks. When I tried that, it seemed a sure way to quickly wear down my grinder. I think there is an easier, more efficient way to cut the sheet metal screw bottoms off. A hacksaw would work, but that's a lot of hand sawing...

Even though the sun broke through the fog today, it was very cold - in the low to mid 30's. Too cold to mortar bricks. If I was just building up without corbelling in, I may be able to get away with the mortar not adhering so good. But since I am changing the circumference of the chimney, I need mortar to stick very well. This arctic chill shouldn't last too long. By February we should be warming up here! I started back in on making pots.

Wednesday, December 2, 2009

Tidbits of Progress


I've been working on the kiln these past couple of days. Today Howard came over, and screwed in the upper insulation & sheet metal on the back side of the kiln. You can see in the photo that the sheet metal now covers the bricks on each side.

He took the burner assembly with him to pick up pipe fittings, and connectors. We were going to use the gas valves from my old kiln, but on close examination the old turn-on valves were quite rusted inside. Just another couple of pieces that will be replaced with new ones.

We went over what to do with the door. After he left, I took the angle iron door frame over to Claude so he could drill 24 holes around the frame edge. This will make it easier to screw sheet metal onto the door frame. It was quite a maneuvering experience moving the 2.5' x 7' door frame around Claude's small workshop so the drill press could make the holes.
Tomorrow, I'll try to attach the sheet metal to the door frame, myself.

This afternoon, I picked up the (hopefully) last bucket of mortar. I paid twice the price as driving to Portland for mortar, but only had to drive half an hour vs. 2.5 hours to north Portland.

Monday, November 30, 2009

Front Door Mock-up

This afternoon, I bricked up the doorway to see where I wanted the peep holes to be. Tomorrow, I will put the door sheet metal up to measure where to have peep holes cut.

I counted 75 hard bricks in the door and I still need 3 or 4 more for the very top. The plan is to have one row of hard bricks nearer to the inside of the kiln, and a row of soft bricks as back-up. I have an angle-iron frame that holds a piece of sheet metal to be lined with kaowool insulation that will fit over the doorway to seal the bricks.

Tomorrow I'll be working on the chimney. Looks like I'll spend over twice the price I've been paying for a bucket of mortar to get 1 bucket at a business in Roseburg. I cannot justify the time/gas to drive to Portland to get very inexpensive mortar. All the other times I picked up mortar in Portland (at least 6 buckets, so far) I was going to Portland - over 2 hours away - for other reasons. I better not need more than one more bucket to finish the chimney!

Sunday, November 29, 2009

Lower chimney mortared


Today, I mortared the lower part of the chimney. You can see the way the sides are stair-stepping in - that is the corbel.

I'm almost out of mortar. A trip to Portland will be in the next couple of days to pick up another couple of buckets of mortar. I'll not be caught short the rest of this kiln - I'm getting 2 buckets of mortar!

There is enough mortar for a couple more rows. Each row is fewer bricks for another 15 rows or so. No rain is forecast for this next week, so only short daylight and cold keeps my worktime outside short. And I thought it was tough grinding bricks in 100 degree weather just a couple of months ago. This high 30's is brrr- cold to work in.

Thursday, November 26, 2009

Stoke Hold Doors finished


Wow - it's been more than a week that I posted a blog. I was in Medford last weekend for Clayfolk annual Holiday Show. A good time and a chance to meet again with many pottery friends.

Yesterday, the day before Thanksgiving was a big kiln work day. Howard came over and the stoke hole doors were assembled - they are such a cool design. They will work very well, we decided, after seeing them put together. The design is very similar to one I saw in Daniel Rhodes The Kiln Book. I have great admiration for someone who can take a photo in a book and transform it into something that really works.

I purchased 4 - 6' lengths of threaded rod for the stoke hole doors & chimney. Shorter pieces are needed for different places on the kiln, so we took measurements to decide what lengths to have cut from each threaded rod. Claude did the metal cutting & brought the pieces back so the stoke hole doors could be installed in the afternoon. In the photo on the right, that is threaded rod at each end of the horizontal arms connecting the corner of the kiln and running vertically through the stoke hole door. The door can then pivot at each threaded rod.

Photo on the left shows the upper sheet metal (with kaowool insulation underneath) on the front & side outer walls. Howard screwed the sheet metal in place, while I held the pieces. The top peep hole was marked in the upper back wall sheet metal, but Umpqua Sheet Metal closed early before the holiday, and will not be open until Monday, Nov. 30. I still need another large piece of sheet metal for the main door.

This morning, Thanksgiving day, I was at the kiln early to cut bricks. I had picked up the brick cutter at A-1 Rentals yesterday morning, but there were too many other kiln things to do while Howard was here. It took awhile to get the feel of the brick cutter, but once I caught on to it, I cut every broken edge brick I could find. First, I cut bricks for the chimney, that I had marked ahead of time. As the chimney gets corbeled in (decreasing the width of the chimney by 3/4" each side per row), there is not an even number of whole bricks to fit a complete row. Bricks have to be cut to make a snug fit. Second, I cut the good partial & half bricks I had set aside. Last, I scoured the grounds for most every brick with a ragged edge to cut it smooth. These bricks will be of use later on with smooth edges, no matter the size.

The brick cutter is a big & heavy piece of machinery. It took 2 of us to unload & load it back up to be returned early tomorrow morning. I'll be pouring wine the next 2 days, and unless the winery also wants me on Sunday, I'll be mortaring chimney bricks that day.

Monday, November 16, 2009

(More) Brick grinding

This morning, I emptied the electric kiln of bricks and refilled it with the last batch of 40 bricks (that's how many I can fit in with air space between). The bricks seemed easier to pick up, and I wondered if my arms were that much stronger already. Then I realized that the dry bricks didn't have water weight included. To confirm, I put them on a scale. A wet brick was just under 8.5 pounds, and a dry brick was 8 pounds. I just looked up and found a gallon of water weighs 8.3# (pounds). If you work it down, .5# - which was the difference in weight of the wet & dry bricks - is 2 cups or 1 pint of water. That's a lot of water in each brick that was baked out.

I procrastinated and swept up the studio, then went to my favorite job: grinding bricks. They weren't as bad as I originally thought and I cleaned 75 bricks before lunch. Yes, my arms were getting kinda rubbery. I think there are now plenty of bricks prepped for me to get going on the chimney.

Yesterday morning, I finished painting the kiln metal with primer. Today, I found some places I forgot and was able to salvage my paint brush from the trash for the last touchups.

In 2 days, I will head to Medford for the annual Clayfolk Holiday Show this weekend. There will be no work done on the kiln for a week.

Saturday, November 14, 2009

Painting angle iron

These are some of the angle iron pieces I picked up yesterday. They have been painted with primer and are drying in the pottery studio. Before painting, I rubbed down all the iron surfaces with steel wool. I figured one uses sandpaper on wood, and steel wool would do similar to iron.

On the lower left is one of the stoke hole doors. We are planning on putting soft bricks inside the stoke door frame. The 2 smaller pieces to the right of the stoke hole are door arms that will connect the top & bottom of the stoke door with the angle iron on the corner of the kiln. The door will then be able to pivot into position. It is really a very clever design, that Howard saw in Rhodes' Kiln Book. His interpretation is even simpler than the photo in Rhodes' book. I was wondering how the door was going to work, then when I saw the pieces, it only took a few minutes to figure it out. The long pieces drying on the newspaper, will hold the 4 corners of the chimney where it goes straight up. There are short pieces of pipe on these chimney corner support through which rods will go to tie the chimney together. It will all be clear when it gets put together.

It was quite cold today, but not raining. Too cold to paint outside. The pottery studio is getting crowded with kiln building items, as well as clay-making things that are always there. I'm heading to the annual Clayfolk Holiday Show in Medford in less than a week, so boxes of pots are already on the floor, also.

Wednesday, I loaded up 126 of the leftover arch bricks to trade them for more straight bricks that I need for the chimney. A fellow potter offered to swap some of the bricks she has been collecting for years for a wood-fired kiln of her own. When I got there on Thursday, I found her bricks were covered with fir needles, moss and leaves - there were even trees sprouting from some of the brick stacks. Upon examination, there was remnants of mortar on most every brick, but just very small amounts. Otherwise the bricks were in great condition. In conversation I found she had purchased these bricks from the same potter who had sold the bulk of the hard bricks I acquired earlier from another potter. Most all my kiln bricks had come from the same potter, now out of the business & onto other ventures. Thursday evening I went ahead & unloaded the bricks, as it wasn't raining, and I knew I'd be using the truck to pick up angle iron the next day. That's over 1000 pounds moved into and out of the truck - a ton of bricks that I moved today!

Twenty of the new-to-me bricks were stacked in front of the studio heater. It will take quite awhile to dry all the bricks this way, which needs to be done so they can be ground smooth for use. I was chatting with Claude, and he suggested I pack my electric kiln with bricks and dry them that way. Today, I found I can get 40 bricks into a kiln load, stacked with air space in between. A few hours later I learned that burning off organics in this method STINKS - ugh! The good news, is the electric kiln is in a garage, so it isn't stinking up the studio. I ran the kin on preheat for6 hours today, and that wasn't long enough to dry the bricks. So I programmed it to go on at 4am, and I'll check the bricks when I get up in the morning.

Tuesday, November 10, 2009

Metal Shopping

Steve, the welder had given Howard a list of materials he needed to fabricate the stoke hole doors, the main door and the chimney reinforcement. The list was emailed to me over the weekend.

Early Monday morning, I was calling around Roseburg to find the materials, and priced some of the items. Just before I left the house, I received a message from Umpqua Sheet Metal that my chimney cap was ready.

It was going to take at least 4 stops to get everything. First, I went to Claude's house a mile down the road. I had tried cutting a piece of rebar with a large pair of bolt cutters, but that was a joke. Claude had a metal cutting saw that did the job in a matter of minutes.

Next, I headed to the south end of Roseburg to purchase 4 pieces of 6' long threaded rod. I figured I would need washers and nuts, but forgot to count how many I had left from what I purchased earlier for the corner posts. 16 sets of nuts & washers will be needed, so I got 12 of each. Later I found extras of washers & lock washers, but I'm 2 nuts short. (I'm sure worse has been said of me - those can easily be picked up later.)

The 1/2" steel pipe I needed comes in 20' lengths, but all I wanted was 5'. I was sent to a welding shop around the corner so I could get the shorter piece I wanted. Did I want the 1/2" measure to be on the inside of the pipe, which was the standard way it is referred to, or the outside of the pipe. Well, that was not on the list, so I thought for a moment and went with the standard of 1/2" being the inside measurement. I'm guessing that 1/2" rebar or threaded rod will go through the pipe. (But another instance of my learning more about materials I never imagined I would want or need to know.)

Last, I drove to another part of town for angle iron. 2 of 20' lengths cut into 2 pieces. But they were overhanging the bed of my truck by a lot. I should have thought of that earlier, I know full well the bed on my truck is 6' long. The man was very nice & tied fluorescent orange plastic tape on the end of the iron. He also wired the pieces together in 2 places so they wouldn't be moving around in the truck bed. The iron was hanging over to one side, as well as quite a bit behind the truck, as it was in at an angle. He was quite concerned about my driving through town like this. So I assured him I would stay in the right hand lane all the way and not try to pass anyone on the freeway, either. I had at least a 30-mile drive to deliver the metal supplies.

On the way out of town, I made one last stop for the stainless steel chimney cap. It is not large or complicated, and not inexpensive either. I wanted Steve to be able to at least see the cap, in case it would make any difference to what he was doing. Apparently not, so I brought the cap home. Just another kiln part sitting around until it is needed.

Sunday, November 8, 2009

Sealing the Arch Bricks


What I have done here is put mortar on the edges of the arch on the inside (left photo) and the outside (right photo) of the kiln.

You can see on the inside - left photo - that the seams of the wall were also mortared. Even though there is an entire wall of soft brick behind the hard brick on the hot face - inside - of the kiln.

I'm not concerned about putting mortar between the arch bricks for 2 reasons. First is that the arch will expand and rise when it is heated during the firing of the kiln. If the bricks were mortared, it would hold back their expansion. The second reason is even more basic: There will be a layer of 2" of kaowool, the space-age insulation material, laying on top of the arch. The insulation will butt up against the stair-step of frontwall and back wall bricks that sandwich the arch together. In the right side photo you can see part of the stair-step of front wall bricks.

Kaowool is an excellent insulating material. It does have some natural forces that will detract from its insulating qualities as time passes. First is that kaowool does not like to get wet. Besides the kiln roof, I am going to great lengths to make sure the chimney opening will not leak any rainwater. Next, is that kaowool is a lofty product that loses some of its effectiveness when it is compressed. I will not place heavy objects on top of the arch & kaowool in the mistaken idea that it will increase insulation. The other natural hazards I have found to be much harder to fend off. They include birds pecking at the insulation for nest-building material. Other country varmits as mice, rats and bats will leave their scat on the top of the kiln - yucky! I have only found dead pencils in a kiln after a firing, but have heard stories of finding skeletons of lizards and even a cat (it crawled inside during a cold night, before the door was bricked up).

Thursday, November 5, 2009

Organizing Kiln Materials

While there was no thing done on the kiln today - a lot got set in motion.

Early this morning, Howard and Steve the welder, were over to take measurements. They measured for the front/main door, the stoke hole doors, and the chimney. All the places that Steve will fabricate angle-iron pieces for. There was a bit of discussion about the chimney, how far it will go up and the chimney cap. Had to make sure that all 3 of us were on the same page.

Early afternoon, I was picking up sheet metal pieces that were folded to fit above the sheet metal on the front, side & back of the kiln. The back piece still needs the top peep hole marked and taken back to be cut out. I also discussed the stainless steel chimney cap design with them, got a quote and ordered it.

Next stop was for sheet metal screws that will be used to hold the upper pieces of sheet metal & insulation in place. It took 3 stops, of course the big box hardware stores didn't carry what apparently are specialty sizes. A local hardware store had an incredible assortment of screws and fasteners. I will remember this place, and they are so nice to work with. Handyman Hardware in Roseburg, OR - gotta make a pitch for them.

And great news for me: Michael Fromme, thank you. She will trade me staight hard bricks for arch bricks. With luck, we can meet up together next week.

Just as I start to get frustrated with kiln progress, things turn around and look up.
This is not a project that I have done by myself. It has taken a lot of help from many people.

Wednesday, November 4, 2009

More bricks needed

The more things change the more they stay the same - or something like that.
Paul didn't make it on Monday, but did spend one hour on Tuesday, his last day here, grinding mortar from 8 bricks. The bricks that were easier to clean have been long done. Only the bricks that are more of a challenge remain. I spent a couple of hours grinding bricks on Monday, but only an hour today, Wednesday. Tuesday I did not work on the kiln. But I did send out a plea for more hard bricks to pottery organizations I belong to in Eugene & Southern Oregon. No one is knocking down the door to sell me bricks, yet.

On Monday, I took measurements to estimate how many more bricks I will need to finish the chimney. Howard had showed me how to do this: I had the chimney mocked up to the end of the corbel, when it will go straight up. From this point on there are 7 bricks needed for each row of chimney. With a tape measure, I determined I need 67" from the the top of the last corbelled row, to get through the top of the roof of the kiln shed. Each 2.5" x 4.5" x 9" brick is laid such that the 2.5" side is the rise part of the row. By dividing 67" by 2.5", I find I need at least 27 rows of bricks to clear the top of the roof. 27 rows times 7 bricks per row makes 189 bricks needed as a minimum. This will just barely clear the roof, I will need to build the chimney a few rows higher, just to be able to attach rain flashing. A stainless-steel rain guard will be fastened to the top of the chimney - just how is yet be determined.

I have put aside bricks needed for the bag wall, and door. Am currently drying out bricks to be ground that will fill the burner ports when wood is the fuel being used. I have enough bricks to be used as peep hole plugs.
Did some counting of the remaining bricks available: Can scrounge up about 100. Can clean perhaps another 20 or so. If I count broken bricks, I can include another 25 or so. But I'm still short.
In the meantime, I try to grind a few bricks everyday, so the job doesn't get overwhelming. I'm going stronger on making pots for the first firing. Even if the kiln was to get finished in a week, I have a few weeks of making & glazing pots before any firing can be done.

While dismantling the chimney on Monday, I placed each row of the chimney is in its own stack, so I can replace everything in good order. The last row of bricks corbelled in is row #21. Originally, I had planned to put the damper above that row, but found it to be too tall for me to reach without using a ladder. I would like the dampers to be more accessible than that, so needed to figure how much lower I could put them. On top of row #16 looked to work best: I could reach the dampers to open/close them, and there was still plenty of room to handle the kiln-shelf pieces from the outside even when they would be completely shut. Per Howard's advice, I worked out how I would indent the front & back portions of row #16 about 3/8". This would then serve as a shelf for the dampers to slide on, and help to keep them from warping.
Row #17 would be of "splits" (1.25" x 4.5" x 9"), which are nearly the same height as the dampers, and will allow them to slide easily in & out. Row #18 will have "lintels" (2.5" x 4.5" x 13.5") whose extra length bridges the 9" width of the dampers. I didn't have my camera out at the kiln site while doing these mock-ups. Will make sure these rows get photographed when I get to laying mortar on the chimney bricks.

Monday, November 2, 2009

Back wall all bricked up

On Sunday, yesterday, I finished bricking up the back of the kiln. I sealed with mortar the seam between the arch and the back wall from the inside. While inside the kiln, the seam between the arch and front wall was also sealed. For some reason, this small amount of bricks took much of the day. Besides not raining, it was not freezing, making it a good day to work outside.

There are still a couple of bricks to be added to the top of the front walls. This afternoon, Paul will come by and grind mortar from more old bricks. I moved about 20 bricks inside the pottery studio in front of the heater, since wet bricks only clog the grinder. This is not the most fun job, but a 'necessary evil' for someone who looked for deals on used bricks.

Once more bricks are ground, I will have a better count of how many usable bricks are left for the chimney. Besides the chimney, smaller amounts of bricks will be needed for the bag wall (inside between the firebox and stack of pots), burner ports (when firing with wood, these holes need to be bricked up), peep holes and a few more door bricks.

My piles of bricks in the kiln yard are going down fast. Today, I want to take down chimney bricks to see how the dampers will fit in. Also, I need to see how the better bricks remaining will work into the lower (the foundation part) of the chimney.

Saturday, October 31, 2009

Bricking up top front of the kiln


I just like the photo on the right. This is the inside of the arch, unmortared, staying in place with the pressure of the corner angle-irons & skewback bricks holding tight.

The left photo shows the front of the kiln bricked up to cover the arch. I did this on Thursday, Oct 29. On Friday, I mocked up the rest of the back wall, but found I needed one brick cut to fit on the first row above the bottom of the arch. I was at a stop point, so decided to measure for sheet metal to cover the upper bricks on front, back & side of the kiln. Friday afternoon, I headed to town & the sun broke out, bummer for me. I'd worked outside on Thursday in very cold and damp weather. Friday was a bit warmer, but the sun didn't come out until I was heading into town. I could think of so many things to do at the ranch in the warm afternoon sun, but would miss out on for that day.

Anyway, I went first to where I had rented the brick cutter so see if they would cut one brick for me. Lucky for me, there was no problem and it only took minutes. I made sure to mention that I needed to rent that tool for another full day.

Onto Umpqua Sheet Metal, where I took a small piece of sheet metal, and ordered 2 larger pieces, all to be folded & cut to order. I requested a quote on a stainless steel chimney cap. Didn't realize how specialized chimney caps were, as the man I talked to sketched 3 or 4 different styles of chimney caps. I'm just trying to get a ballpark estimate of how much more money I need to set aside.

The last time Howard was here, he showed me how to guesstimate how many more bricks I will need for the chimney. I counted up all the remaining bricks, those still to have old mortar ground off, and those that need to be mortared back together. Including everything, it will be nip & tuck to have enough bricks to build the chimney through the roof over the kiln. I'll see how many bricks I use this next week, as the chimney will be on the schedule in the next couple of days. At least I won't have to concern myself with picking up odds & ends of left over bricks...

Friday, October 30, 2009

More Kiln Supplies

On Wednesday I went shopping in Portland for kiln supplies:

I needed another box of kaowool (the spun alumina, hi-temp insulation). Howard had suggested I get 2" thick instead of the usual 1". The door & above the arch would benefit from the extra insulation. I have been contemplating rebuilding my raku kiln (since I'm rebuilding kilns, anyway) and that requires 2" of insulation, also. That should just about use an entire 2' x 25' roll of 2" thick kaowool.

The dampers on the chimney will have a lintel brick (13.5" x 4.5" x 2.5" instead of the regular 9" x 4.5" x 2.5") above them. The longer lintel will straddle the 9" wide damper, for strong chimney support. I had 1 lintel remaining and, though I only need 2, wanted to get 2 more (they don't cost that much & I would have one for a spare - just in case I need it). Jeff, at Hi-Temp NW, where I get kaowool and mortar, just happened to get some lintels in the afternoon before I came. Apparently, I wasn't the only one requesting such bricks. Even better, I was saved a trip across Portland to a far suburb where another brick supplier is located.

Next stop was Georgie's, the Pottery supply store. They had kiln furniture on sale in October, and it was getting late in the month to get my discount. I had one old damper, a 9" x 20" piece of mullite kiln shelf. I need 2 of these for the new kiln. By phoning ahead, I learned I could get a 20" x 20" kiln shelf cut into 2 pieces with a small strip left over. Again, I want to have a spare damper, and I can cut the left over strip into pieces I will use.

Thursday, October 29, 2009

The Arch Has Sprung!


See: I can stand up in my new kiln - with my boots on, too!

This was absolutely amazing - to watch the arch actually spring from the arch support (where was my camera at that time?).
Howard & I added bricks to the arch one at a time from each side.
When we got to the last row, front-to-back, it was arch bricks (which are larger on one side than the other, so they will turn a circle).
This center brick is called a "key" brick, because it 'keys in' the arch.

Well, we put the key bricks in from front to back, and they only went in 1.5" of 4.5". I kept wondering how we would get them in all the way. Wouldn't we lift the wooden arch support holding the bricks up? We could lift it up just a fraction of an inch and have quite a bit more space on the top of the arch. No, it could lift the brick resting on the wall, which we really would not want.

What Howard did was to slowly tap the bricks in. He went from front to back many many times. The bricks kept going in further, a little bit at a time. As they moved, he started pounding the bricks - the arch support was holding firm. He pounded and pounded away. He pounded on all the bricks in the arch, not just the key bricks. As the key bricks got closer to all the way in, the arch started to spring from the wood form. It started at the sides of the arch, nearest where the arch sits on the side walls (actually the arch is supported by the skewback bricks, those cut at an angle).

When the key bricks, in the center of the arch, were all the way pounded in, the arch bricks sat just above the arch. H went under the arch, into the kiln. He carefully tapped the 2" x 6" pieces of lumber that were holding the arch support in place. One corner at a time the wood support fell away, and the arch bricks held. Of course, I was holding my breath. H was confident, as he has build many kilns over the years.

Then we took some photos and broke for lunch.

I have a lot of bricks to mortar now. The front & back walls need to be built to cover the arch support, then insulation on the top of the walls & the arch. Finally, the chimney will be mortared. We did a quick calculation of how many bricks will be needed for the chimney & how many bricks are left. It looks like every brick will be used. I'll have to count more carefully, and determine just how many more will be needed.

Monday, October 26, 2009

Real progress


There was a lot of progress made on the kiln today. I've been preparing many pieces and parts, and it was gratifying to see them go up smoothly.

First the angle iron went up. Howard drilled holes into the concrete through flaps on the bottom of each vertical post. The posts are then bolted onto the ground. Stainless steel tie rods were added at the top of each angle iron to stabilize the tops as well as the bottoms. We added valve springs onto the tie rods on top to absorb the expansion of the arch when the kiln is at its hottest.

As we erected the vertical irons, sheet metal with kaowool insulation adhered to it, was slipped into postion. The kaowool is spun alumina, a space-age insulation product that works best when it is not compressed. I had the sheet metal edges folded in a z-shape, so the sides would fit under the angle iron, and the center pooch out to give space for the insulation.

The first photo is the front of the kiln where you can see the wooden arch support above the sheet metal. A close examination shows 8 rows of bricks on each side of the arch support. There are another 11 rows of bricks to be added in the middle/top of the arch. When all the bricks are on the arch support, it is carefully lowered just a fraction of an inch to make sure nothing falls. There is no mortar on the arch bricks or skewbacks, they are held in position by the shape of the arch. Angle iron & tie rods keep the arch bricks from spreading or falling. When we are confident the arch is holding (of course, it will!) the wooden support will be removed from the kiln.

On the left side of the kiln front you can see the white kaowool insulation through holes in the sheet metal. The upper hole will be cut out to reveal the opening where wood can be stoked, and the lower hole will be for a propane burner. There are similar holes in the sheet metal on the back wall. You can see them on the second (right side) photo. The back of the kiln can be seen on the left and the firebox side is on the right of the photo on the right side above. Holes on the far side of the back wall are peep holes, which when opened will allow me to check the heat rise during a firing. The holes on the bottom of the firebox side walls are called "mouse" holes. When these are opened during a firing, they will allow fresh air (more oxygen) to enter the firebox. This would be to encourage a hotter wood fire, when that is the fuel being used.

After the arch bricks are set, I get to go back to mortaring bricks on the front & back walls. My supply of good hot-face bricks is getting very low. I'm trying to use the better looking (newer, less chips or gouges) bricks in the main kiln, where it will get hottest. The chimney can take any left over, old, cracked, chipped or otherwise compromised bricks, and it will not affect the way the kiln fires. I have a number of old soft bricks that I'm planning on using to insulate the chimney until I run out of them. We'll see how much of the chimney will get insulated this way.

Sunday, October 25, 2009

No pics today - or yesterday. It was a frustrating weekend for kiln-building.
I did grind the edges of all the skewback bricks that the brick saw missed. And the extra skewbacks, a total of 40 that had their edges trimmed.

I started to mortar the chimney bricks that I had taken down in order. After I mortared the base of the chimney - which had never been done - I found that my measurements were off.
What I found was that in my haste to mock up the chimney and cut bricks last Monday, I had not measured accurately. In fact, the cut bricks for the chimney varied from front to back of the chimney on most every row. A real bricklayer would have noticed this discrepancy immediately, and gone back and remeasured until it was correct. But not me! My amateurish bricklaying techniques had to show through with flying colors.

When I restacked the chimney - this weekend - I found 15 - 20 bricks that have to be recut. I suppose this is a postive aspect of my bonehead bricklaying: the bricks need to be cut more rather than being too small. Since one cannot glue on another 3/4" or so if a brick was cut too short.
I would like to cut a few more hard bricks to use as posts when stacking the kiln. Assuming there are extra hard bricks after the chimney is done. The quantity of bricks is going down very fast, and I sure hope I don't have to put out a call for the last 20 or so bricks...

My frustration came from the fact that I cannot lift the brickcutting machine. I need a strong, able-bodied person to help lift & set-up the brick cutter from my rig. Then I need the same individual to assist in lifting the brick cutter back into my truck. I was able to get ahold of my hired kid to help out last Monday, but I need enough work to keep him occupied while I keep him here. You don't just call someone out to work for 10 minutes, then let them go until 7 hours later. Frustration. It will work out in a week or so, I will have someone here to help me lift such heavy items.

Tomorrow, Howard is coming over early to set the angle iron on the corners and start the arch.
Progress will step up in pace - I expect...

Tuesday, October 20, 2009


Lots of photos today.

We'll work in reverse: last pic is angle iron braces that have been painted with primer - to protect them from rust. The iron pieces are from my old kiln and nearly 30 years old, I'm figuring they need all the help they can get to stay strong. (Vitamins for iron!) These 2 make 6 of 8 iron pieces to get primer'd. The door has yet to be fabricated.

On the right are the arch supports for the old & new kilns of mine. The old kiln used the smaller one. The larger arch support has to include the firebox in the new kiln. Also, in a wood-fueled kiln the shelves are spaced farther apart to facilitate movement & distribution of ashes from firebox to flue.

The first 2 photos are the chimney dismantled. Each row of chimney bricks is in it's own stack, in order that they were taken down. I wanted the stacks to be out of the predicted rain for tonight. It may take me a few days to mortar the chimney back up.

I did start mortaring the chimney, and found I had to move loose bricks down to the 3rd row of foundation. I had not mortared the chimney area at all! When I put the level on the bricks, they were very out of alignment. Who the heck set the foundation & mortared those first rows?? All the more evidence of how much better of a bricklayer I am now. And the 4-foot level I am using sure helps to keep the rows even. Claude gave me this level after I started setting rows of bricks for the walls. He noticed the challenges I had using a 2-foot level, in keeping my rows even. I now recommend no person attempt a kiln-building project without a 4-foot level.

Late this afternoon (5:30pm, the sun was down, the days are getting much shorter) I quit mortaring the chimney at the first corbel-in row. I set the bricks dry & found they were very tight. I'll have to make some adjustments in the brick positions as I go up the chimney. Yesterday, when we dry set the chimney & cut bricks, it was at a good pace. Now I am carefully measuring & mortaring bricks. I rented the brick saw for just one day, and do not have the luxury of having one on hand everyday. Thus, I will make adjustments as the bricks get set, and not concern myself with having everything look "pretty". This kiln is a tool and it will have the requirements to produce great looking pots. It is not intended to be a showpiece as a work of perfect craftmanship in itself - that would be the position of a professional kiln builder. (Though it will be a feat of accomplishment, if I do say so myself.)

Monday, October 19, 2009

Brick Cutting Day


After some early morning rain, no more was expected, so I picked up the brick cutter I had reserved at a local rental place.

I was able to get a hold of my hired young man, Paul, who came over this afternoon to cut bricks.

It took us at least an hour to figure out how to set the machine to cut skewbacks at the exact same angle. Claude was in on that part, so it was 3 heads working together. I need 18 on each side, a total of 36. So I had Paul cut at least 40 skewbacks.

Next we went to the chimney, which is not mortared yet, just dry set. I just kept building it up and had to cut 2 bricks per row, as we corbeled in 3/4" per row per side. That means we made each row going up 1.5" less wide than the row below. I think one can figure out what I mean from the photo on the left.
The only (minor) complication was when I dropped a ruler down the chimney. Of course, it was near the end of the day, and the chimney was getting high. Fortunately, we were able to go into the kiln & reach through a flue hole to get it out.

We took a break in the middle of the day to go to Claude's workshop & pick up the arch support he had made. I believe I am ready to lay the arch bricks - as soon as I coordinate schedules with Howard. He may find something else I need to prepare...

My body is so tired & exhausted today. I'll sleep like a rock tonight.

Thursday, October 15, 2009

Peek of the Future


The angle iron is not yet bolted into the cement foundation, but this gives an idea of what it will look like.
The arch will sit on the top bricks, then the front & back will be bricked up so you cannot see the arch from the outside.
Sheet metal will be added above the shown pieces once the arch, and front & back are finished.
Kaowool insulation will sit inside the sheet metal, and peek out the stoke & burner holes pictured on the left side of the doorway.

My neighbor Claude who is a major supporter in this kiln project, gave me a much needed hand today. He held the back piece of sheet metal in place, so I could go inside the kiln and use a marker pen to draw the 4 holes that need to be cut out: the back stoke & burner holes and the bottom 2 peep holes. This is the only way I could think of to get the holes exactly in the correct positions. Tomorrow, on my way to the winery, I will take the piece into town for cutting. Won't be able to pick it up until Monday, but that will be soon enough.

This afternoon, I mixed concrete for the first time ever, and filled cinder block holes on the right side at the base of the angle iron. Mixing concrete was much easier than I thought it would be. Even easier if you use the 'just-add-water' stuff, and only mix 5 pounds at a time.

I also painted primer on the front angle iron pieces. The back pieces were prepped by sanding with steel wool, and will get painted soon.

Almost rented a brick saw this afternoon to cut skewback bricks. But I got a message that I am wanted to mind the tasting room at the winery tomorrow & Saturday.
Next time it isn't raining alot, Monday or Tuesday, I will rent the brick saw. Besides the 36 skewback bricks (and probably a few spares), I want to cut some bricks for the chimney area.
The chimney is at the point where I will corbel in .75" on 2 opposite sides, on each row. This will mean a brick has to be cut on 2 opposite sides that are not corbeled in, because I'm shortening the row by 1.5" (2 x .75" = 1.5").
As soon as there are pictures, it will be clear what I'm talking about.

The kiln is starting to look like a kiln already - just wait til the arch gets on, then it really will.

Tuesday, October 13, 2009

Measuring sheet metal

No photos today. I sanded 4 corners of the soft brick to make it (near-) perfect level.
My arms felt like they would fall off, after 3 hours of vigorous sanding with a hand-held thing that looks like a small cheese grater. I think my brain is fried, I cannot think of this tool's name.

When I place the angle iron on the corners, each corner is now perfectly level on the vertical.
Yesterday afternoon, I took sheet metal pieces for the kiln front in to be pleated. This is so the kaowool will not get squished, and will retain its loft & insulation properties.
I brought the pieces home last night, and remeasured them in the angle iron. After much measuring, figuring and thinking, I decided where they would be cut & the other sides pleated.

Today I also, measured for sheet metal on the left - firebox - side and back of the kiln.
I must be very slow at figuring things out, because it took me quite awhile.
My next kiln would go much faster, and I would be more meticulous in my brick-laying. Then I wouldn't have so many corrections to make later on. But this will be my last kiln to build. It is an incredible amount of work.

I took my measurements and sheet metal back to the sheet metal company and hope they will have my pieces ready later tomorrow. I have yet to measure the back side sheet metal for stoke, burner, & peep holes. I think it will be more accurate after the side pleats are put in.
So I'll keep taking the sheet metal back & forth. To the kiln for measurements, and back to the professionals for cutting.

Tomorrow I'm also thinking of a trip to the pottery supply in Eugene. Need to get sodium silicate, which Howard says will "glue" the kaowool to the sheet metal. That would make it much easier to keep the kaowool in place, so it doesn't slip around when installing the sheet metal.
And I can pick up some clay while I'm there.

Progress is snailing along again, but I will stay optimistic that things will move faster soon enough. It is the prep work that takes all the time.

Sunday, October 11, 2009

Angle Iron Verticals


The welder did a great job fabricating the corner angle iron pieces. I need to shave the soft brick corners so there are no protrusions. Thought I had done it, but not good enough. When the angle iron fits snug, and is perfectly vertical, it will eventually be bolted into the concrete foundation below.

The next step, before the arch, is to super-insulate the side walls. One inch of Kaowool, a spun alumina space-age insulation blanket will back all the brickwork. The Kaowool will be held in place with sheet metal. I have some pieces of sheet metal left-over from my old kiln. Some of the pieces can be used on the new kiln. Howard phoned this morning with a great idea: When I have the sheet metal cut to fit & holes cut for stoking & burner ports, I should have them pleat the sheet metal. The pleats would be in a Z-shape to fit under the edges of corner angle iron. This way the insulation blanket would not be smooshed, but stay lofty. That is the thing about soft insulation, it needs space to be effective.

Howard & I measured the sheet metal for the front of the kiln on Saturday. It took quite awhile to do this. I want to double check all the measurements before I have the sheet metal cut. And I'll have to bring in my old sheet metal for cutting before I order any new sheet metal, since I do not know what gauge (thickness/strength) it is. This is looking like a few trips to town for the sheet metal.

The photo on the left shows a mock-up of a start of the corbel-in on the chimney. Corbel-in is how the chimney goes from very wide (45" from side-to-side) to desired chimney width of 13.5". I only went a few rows up, then laid a straight-edge along the outside ladder of bricks to see where they will come together. The chimney will be at its desired width at the height of the angle-iron that supports the skewback bricks. I want to figure out the size of sheet metal that will be on the right side wall next to the corbel-in chimney. More figuring...

Rain is in the forecast after one last day of sun. I can always make pots, if I cannot work on the kiln.

Thursday, October 8, 2009

Row 25


It has taken awhile to get this far. Photo on the left is the back wall with part of the left side wall. That is a fluorescent green, 4-foot long level resting on the back wall.
Photo on the right is 4" angle iron (L-shaped) that has bricks set on the iron.
Back 2 blogs, on Sunday, October 4, I posted a photo similar to the one on the right above, but without the angle iron. The photo from Oct 4 also showed a sample of skewback brick which is cut at an angle. The skewback bricks, cut at an angle, will also have to have a notch cut into them to set on the angle iron. It doesn't show in the photo, but the 4" angle iron is holding the 2.25" side of the brick. Therefore over 1" of angle iron sticks out - this is the brown strip seen below the vertical side wall bricks.

The edges of the angle iron had to be ground smooth, I got a sliver in my thumb right away.
Then they were lifted onto the side wall - they were so-o heavy!
Each brick that is sitting on the angle iron had to have one edge ground down. Because the bricks have sharp corners, and the angle iron has a rounded corner.

Howard says I want to make a wooden box to put a brick into so I can cut the skewback angle the same for all 36 bricks that will be used. Makes sense to me. Sounds like the best way to get the exact same cut on each brick.

The top row on the back wall is not yet mortared. I'm checking to see if I set the arch up to the already mortared back wall, or I brick up the back wall to the already set arch.
I'm thinking the former is the best idea: mortar the back wall, then set the arch against the wall.
I'm planning on mortaring the front wall to fit against the already set arch. Seems that the bricks have the best chance of fitting snuggest that way.
Hard to think of bricks being snug, but the word seemed to fit.
One more day at the winery, then Howard comes over on Saturday with the first installment of angle iron.
I'm excited. There will be big changes to see then.

Wednesday, October 7, 2009

Shopping for Metal Supplies: Tie Rods and Valve Springs

Monday morning Howard brought Steve, his welder friend, over to see the kiln.
It was so-o-o cold, about 38 degrees F. I must have been wearing 5 layers of clothes.
Such a change from the 100 degree weather of just a few weeks ago.
Anyway, much discussion and measuring occurred. They were there just over an hour - in that weather, decisions get made fast.

That afternoon, my husband took a truckload of angle-iron pieces from my old kiln over to Howard's then to Steve's for reassembling.
I went to a near-byl town to pick up more angle-iron, in another size.
And consulted with Dave, my local car mechanic, about valve springs. Howard had said to find "valve springs" that would go on expansion rods above the top of the kiln. Dave told me that 20 years ago he would have buckets of them around, but no more. Nowdays he replaces more parts on cars that he used to repair. But he did tell me where to look for them.

Tuesday morning was even colder: 36 degrees, (there goes the basil in the garden).
So I drove to the next larger town for more metal supplies.
I phoned first, and got a quote of $1 each, for used valve springs. Not too bad, I figured, since I was advised that new ones run about $10 each. When I got to the shop, the man I had spoken to was out, and luckily another had heard I would stop by. He picked out my 8 used springs, and threw in a few more for good luck. I offered a large porcelain mug instead of cash, and after a moment deliberation, he went for it.
Monday had been a tough day for me mentally - hey it happens to lots of us - and Tuesday was looking up already.

Wednesday I got lots done at the kiln site, and took lots of pictures.
But, I forgot my camera at the studio, so will talk about today's progress tomorrow.
Since tomorrow, I will be at my part-time job pouring wine at the Winery tasting room down the road & on Friday.
This way, I will have something to blog tomorrow.
Progress is coming...

Sunday, October 4, 2009

Skewback bricks


The grey bricks laid on end here are the 24th row. They are arranged in what is called "soldier" bricks. Skewback bricks are cut to fit on the grey, "soldier-laid" bricks. The angle side of each skewback will support the arch, as it lies across the kiln from left to right/right to left. 18 skewbacks will be cut to fit on each side of the kiln.
Pictured is the left side wall, the firebox side of the kiln.
The 2 pics on the right were taken from the inside of the kiln.
The angle-cut brick is a sample of skewback. These are custom for every kiln. There used to be sold skewbacks made from hard brick. While particular angle-cut skewbacks, often 45 degrees, may still be made, a brick company in Portland offered to sell me castable to make 1 large custom skewback to fit each side of the kiln. To support the arch. They said this is how things are done more often, now.

The photo on the left is on the right side of the kiln, the chimney side.
The bricks that are vertical on the top row will back up the skewbacks.
The vertical bricks will also be supported by angle iron.
The horizontally running iron angle will then be supported by vertical angle irons on each corner.
Harder to explain, will be able to show this soon, I hope.

Tomorrow morning, Howard, kiln guru extraordinaire, will bring by Steve, his neighbor & angle iron "Man". I have questions of what pieces from my old kiln are really usable.
And how will angle iron supporting the stoke holes & kiln door be designed.

Stay tuned....

Thursday, October 1, 2009

24th row

For this kiln the 24th row is where the skewbacks will sit to support the arch.
Before the arch goes up, angle iron needs to be on each corner, and on the top row pictured. The angle iron on the top row will be on each side, and it will support the arch. So when the kiln is heated, the arch will expand up and not out.
I have a quantity of angle iron from my old kiln. The old soft brick kiln was held together with many lengths of angle iron. It has been cut into lengths and many of the old pieces will be able to be used in this kiln. The longest lengths needed will have to be purchased (of course).

Here are some mortar qualities that I have learned:
I like using mortar is a sort of soupy consistency. When I purchase mortar it is in a trowel-ready consistency. I trowel about 1/3 to 1/4th of a bucket of mortar into a separate bucket & add water to near soupy consistency. In the very hot weather - I've been working in the summer heat waves of 100 degrees F + which is conducive to more liquid mortar - the hot air dries the mortar quickly. The last couple of days have cooled off dramatically. I can use a touch stiffer mortar on the hard bricks.
The hot face bricks on the inside of the kiln are hard bricks and absorb little water from the mortar. The back-up bricks on the outside of the kiln are soft bricks, and are held in water ( the half of the brick that will be mortared is immersed) just before being mortared. This way the porous brick does not absorb too much water from the mortar & dry it out before it is properly set.

Wednesday, September 30, 2009

How to comment

My daughter Tessa showed me how to leave a comment - it is so easy.
Just scroll your cursor over the bottom of the blog where you read "0 comments"
Then click your cursor and space comes up for you to type in a comment.
If you would like to hear this in person, email me susanpots[at]gmail[dot]com
Please insert @ and . where the words are in brackets.

I would love to hear any comments

next to last row


Today I mortared hard bricks for the 23rd row, and mocked up the soft bricks.
Lots of measuring - and trying to use the odds & ends of soft bricks remaining.
I'm trying to save the last really good back-up bricks for when they will be needed soon.

I can see my stock of really good hard bricks is going down fast.
There are a couple of stacks of hard bricks still to have the old mortar ground off, approximately 40 more bricks. Then there are about another 40 bricks that have a whole lot of junk ground off, that may or may not get done. Last resort bricks they will be called. Only to be used in desperate measures like for the top of the chimney, if a few more bricks are needed.

The arch will lie on the 24th row. The right & left sides of the kiln will have the bricks laid in soldier courses. This means the hard brick will lie from in to outside of the kiln wall. This will facilitate the angle iron that will hold the bricks in tight - and keep the arch from falling.

I will mortar the 24th row of bricks on the back wall, but not the front wall. I think it will leave it easier to handle the arch support from the front.

Before the arch support is laid, I have to cut skewback bricks to help support the arch.
The photo shows the arrangement of bricks in the arch. There will be 5 rows of bricks laid in the exact same way from front to back of the kiln. Howard & I decided to lay the arch without cutting any bricks. He has made kilns in this manner and assures me they work just fine.

I have finished reading Daniel Rhodes Kilns: Design, Construction, and Operation which was first published in 1968 and updated in 1981. It is amazing to me how much of the info is still current - 99%. He has some great kiln designs in the back, and my kiln is just a variation of a couple of his designs.
I seriously considered a catenary arch kiln, but it would have had 2 fireboxes on opposite sides of the kiln, with 2 stokers needed. I really want a kiln that could be fired by one person, with the option of 2 persons if desired.

Monday, September 28, 2009

I've now half mortared the 22nd row out of 24 rows or courses.
YES! There is a light at the end of the tunnel.
Howard came over this morning and we discussed my progress and the next steps for a couple of hours - time flies when you are having fun!
After the 24th row, the angle iron has to go on all the corners, with attachments welded onto each corner that will connect to all the other corners.
Then an 'L' shaped piece goes on each side to support the arch - keep it from falling down.
We had a long discussion on how to fit the bricks into the 'L' shape and support the arch.
Bricks need to be cut at an angle to support the angle of the arch - these special bricks are called skewbacks.
Apparently they are custom fit to each kiln and arch design.
In the past there were standard skewbacks that one could purchase, but kilns are all so different these days, and arch configurations so different, that standard skewbacks were going the way of the dinosaurs.
I had a brick supply company in the Portland area say they now sell castable for custom skewbacks. Meaning that one makes a form and pours or tamps a mixture into the form to make custom skewbacks.
After much discussion, we decided that I will cut skewbacks from soft bricks, and use hard bricks to back them up against the angle iron.
Everything is such an experiment... But I trust Howard's experience.

I have had incredible support from a neighbor of mine, Claude Green.
He has loaned me tools and given much moral support.
He will build the arch support for the kiln.
He built the arch support for my first kiln over 25 years ago.
The dimensions and criteria are much different for this kiln, so again, much discussion has gone on. The big problem to overcome is how to remove the arch support from the kiln after the arch is built. In this kiln design, the support has to come out of the doorway.
Claude came up with the ingenious, yet elementary, idea of making the arch support in 2 pieces - a right & left side - that would be screwed together, and easily dismantled.
Sounds great - now to make it work.

Good night - I'm beat - will pick up again tomorrow.
Kiln building is great work for a good night's sleep.

Saturday, September 26, 2009

20th row - almost there


Wow - it has been a few days since I last wrote - guess I get tired at night.
Sometimes I get frustrated. Like: isn't it done yet?
But the walls are getting close to as tall as they will go.
Today I finished mortaring the 20th row, and started the 5th bucket of mortar.
I think I'm using mortar because of the different brand of bricks I'm using on each row.
Some bricks just look more dense - therefore they appear to me stronger and longer-lasting.
Others seem flakey, like they may last just a couple of firings.
(am I talking about bricks?)
I've been using the dense-looking bricks on the door jamb. But those are the touch larger bricks, so I need a touch more mortar on every brick in that row to keep things even.
Not enough of the touch-larger, denser-looking bricks left to do an entire row... I'll look closer & count again.

I have to decide which row to put the top peep hole in the back wall.
Bottom peep is in the 4th row from floor, which is 7th row from the very bottom, including foundation.
Middle peep is in the 12th row from floor, which is 15th row from bottom of foundation.
To keep them evenly spaced from top to bottom, the top peep should be on the 23rd row.
But the 23rd row may be where the arch sits, so I have some figuring to do - again.

My kiln guru, Howard, informs me the row of bricks the arch sits on needs to be all hard bricks.
And those bricks need to be laid across the wall from inside to outside of the kiln. These are called 'soldier' bricks. Because they support?
Howard is due to come see my progress in person this Monday.
I want to have another couple of rows laid by then.
Can be done - 2 rows in one day.
I'm a very slow kilnbuilder. Possibly because I don't want to make a stupid mistake.
At least, not too many stupid mistakes.
I measure, and remeasure when the bricks are dry set, and again when each brick is mortared.
Takes lots of time.

I've mentioned that I feel like a weightlifter because I'm constantly moving 8.5# bricks.
My son read that and decided I needed a talk about how to lift weights correctly:
He said that I need to think like a weightlifter. This means that before lifting a brick, I need to pause, exhale and tighten my stomach muscles. I'm trying, kid. (ok, he's a grown kid, but still and always, my kid)
How about lifting bricks at head level? Now the kiln walls are getting higher, that's where I'm moving them. Will it help my stomach muscles get tighter? Give me a 6-pack?

Wednesday, September 23, 2009

shopping trip

Today I drove to Portland for supplies.
At Hi Temp NW, I picked up 3 buckets of mortar ( sometimes I think my kiln is drinking mortar) and a box of insulation fiber.

My bricklaying & mortaring ability has improved immensely in the past few weeks.
I expect to be using a significantly smaller amount of mortar than the last couple of weeks.
Learned that I will not be mortaring the arch - it is to be laid loose to allow for expansion during firing, and contraction upon cooling.

Insulation fiber now comes in a 'much-less carcinogenic' form for about $15 more a box.
Because I want to use fiber as a back-up insulation behind hard, then soft bricks, I can use fiber that is rated to a lower temperature: 2300F.
My plan is to back-up the fiber with sheet metal, held in place by angle iron on the kiln corners.
I have left-over sheet metal from taking down my old kiln, and expect to need very few more panels.

The drive up to Portland was on a warm first day of autumn.
I was aware of significant haze in the Willamette Valley and farther south, also.
This evening I heard of wildfires in the mountains that were sending ash as well as smoke into the Oregon valleys.

I am disappointed that readers of this blog cannot post comments for others to read.
If anyone knows of another blog address that allows for comments, please let me know.
I welcome comments at my new pottery email address: susanpotsatgmaildotcom
please substitute@ for at and . for dot.

I read that stops (probably more properly deters) robots & spam from my email address.

I'm looking forward to mortaring tomorrow.
Will have a photo to upload then.

Tuesday, September 22, 2009

grinding bricks & gathering wood

Today was a slow day - I think I mortared a dozen bricks. Since I just counted how many, it is more than I thought I got done.
Some things for the kiln did get done today.
My hired worker did grind old mortar from some bricks this morning.
Then he cut apart the angle iron braces from my old kiln. Now I have pieces of angle iron than can be handled and configured to fit the new kiln.
Before the arch is put on the new kiln, angle iron braces need to be put on all the corners.
Then tie rods will be attached between the corner braces.
And angle iron braces need to be put behind the skewback bricks that have yet to be cut to support the arch.
Wait and see, photos to describe the above will be posted as they come.

Paul, the hired worker, also brought up many pieces of wood that were around the land.
We lost a number of trees last winter, and they were cut into logs earlier this summer.
Now they are near the kiln for firewood. There is a lot of wood splitting still to be done...

I also got Paul to dig some holes in the garden for me today.
While I harvested tomatoes & strawberries.
We've had some very warm days, but the nights are clear & getting quite cool.
So much for the first day of autumn.

Then Paul had another hour to work, so he ground some more bricks.
Looks like the brick supply will be good for some time to come.
I think grinding bricks is one of the worst jobs - the dust is incredible.
And one really doesn't want to get in the path of that floating dust.
Dust masks are a pain, but we each always wear one.

Monday, September 21, 2009

Half built kiln walls

Today the 18th row, pictured here, was mortared.
The middle peep hole is barely visible in the back wall through the doorway.

I've patched holes in the 3 rows of foundation bricks that were seeping sand. Sand had been swept between the bricks of the 3 bottom courses to keep the bricks from moving. But it kept slipping out - I guess as the earth rotates, it shakes the sand down, or something like that. Perhaps, as I walked on the kiln floor, it shook the sand through.

I'm feeling like I'm making progress. I can tell the walls are getting higher because it is hard for me to read my tape measure across the top. I placed cinder blocks along the front & back, so I can reach the top easier. It will be the next row or two that I'll have to use a stepladder.
Just as I am picking up time in my bricklaying technique, I'll be moving slower as I tote a stepladder around.
If I was taller and could see the top of the row I'm working on, I would just have to lay more rows. I'm going to make the kiln just tall enough for me to stand up inside. That will make it easier to set kiln shelves when loading pots for firing.

Measuring:
After placing the inside hard bricks for each row, I measure across each direction on the inside. Need to make sure the walls are even & parallel. As every brick is mortared, each measurement is double checked with the tape measure & a level. Before setting a brick the place is swept with a small hand broom, and the brick itself is swept. Only then can the brick be mortared.
Also, the diagonal measurement across inside corners is checked, so it stays the same from the bottom to the top of the kiln.
Today I learned how to use a 4' level vertically and see how straight the walls are. Sounds easy, but as with many things there are tricks/techniques to reading the tool properly. If I'm making it sound like there is something to it, it is because I was doing it wrong, and needed to be shown the correct way. I guess I'm saying that when I think something should be easy, sometimes I find I'm doing it all wrong - as I did with this. Now I know how to check the verticality of each corner.

Enough for today...

Sunday, September 20, 2009

bricks


I've been collecting bricks for a long time.
This year I acquired most of the hard bricks I have.
The biggest haul of bricks is at least 6 different brands or brick makers. That is in the foreground.
Against the building is another couple of hundred bricks.
In the shadows on the right is another stack of bricks, and the arch bricks.

Hard bricks come in a standard size.
But just like standard sizes for clothes, I found that the brands can differ by 1/8" in any one direction. Now this may not sound like much, but it adds up as the kiln grows taller.
I realized this when I found myself using buckets of mortar.
I'm now into my 4th bucket of mortar.
And I wanted to use as little mortar as possible!
What am I doing wrong?
Well, for one, I am just learning to be a bricklayer.
As I've now mortared 17 rows of the kiln, I can see my bricklaying craftwomanship has improved immensely.
The entire row is level and square.
It just took a bit of mortar to get to that point.
Well - I can see another trip to Portland to pick up a few buckets of mortar is due this week.

It wasn't until I had the first few rows mortared that I decided to separate the stack of bricks into each brand. Who'd have ever thought there was so much business in making hard bricks (those that can take a high temperature: over 2400 degrees F), that there are that many different makers. It took a few days of sorting - each brick weighs over 8.5 pounds, so I'm also a weightlifter now - to get the stacks of Idaho, Diablo, Dad (really, that is stamped on some of the bricks), Yukon, Columbia, Zed, Morex and some others.
The pretty, unused bricks have straight sides and sharp corners.
Most of the bricks have rounded edges and remains of mortar and soot on them.

I've been at the winery for the past 2 days, and fighting a cold.
Hope to mortar another couple of rows tomorrow.
Am on row 18 of about 23 or 24 rows.

The stacks of bricks are going down fast..

Wednesday, September 16, 2009

15th row


I email Howard every day I work on the kiln. Pic on the right is of the stoke hole. On the left is me mortaring the 4th row.

This is tonight's message to Howard:

This morning I mortared the 14th row, tonight I mocked up the 15th row.
14th row includes the lintels that top the stoke holes, soldier bricks on the side walls, and the bottom of the middle peep hole on the back wall.
Did I email you pics of that this morning?

I measured how many more rows to the row the arch sits on.
The inside floor of the kiln is row 3 (row 1 is hard brick, row 2 soft brick), I can see row 15, in 10 more rows, I will be ~5" from the top of the wooden door frame.
The arch has a rise of approx 10".
If I take the sides up 55" (4' 7"), I can still walk in the kiln & stand up easily since the inside height would be around 65" (5' 5").

I have put aside nice bricks to brick up the door, put in the arch and for the door jam.
Need to count to learn how the brick supply is holding up.
So far, so good.

I got oxygen for the cutting torch.
Measured the angle iron I have here. Looks to be 4 of corner angle-iron pieces for the kiln, and 4 of smaller angle-iron for the chimney.
Don't know that there are channel-iron pieces long enough to back up the skew-back bricks.
45.5" is the inside measure from front to back in the kiln, the depth of the arch.

Am getting much better with the mortar. As the rows of bricks are getting more even, I use lots less mortar.

I wonder if I can do these 10 rows in the next week? I'm getting faster, and measuring lots more.

That's the end of my email message. Here's some of my kiln-building thoughts:

There are lots of brick-layers tricks of the trade, I feel I am learning already. I wanted as little mortar as possible in the kiln, and Howard said he likes to use mortar to level the bricks in a row. I use the level on every brick. As I go along the row of bricks, some bricks need more mortar than others to keep that row level with itself & the other rows.

I learned that when I put a slab of mortar in the middle of the brick, how to mentally calculate how much mortar to slop on. The hard bricks used on the inside or hot face of the kiln are very dense and do not absorb much water. On the other hand, the soft bricks which are insulation and face outside the kiln are porous and absorb water easily. They need to be dunked in water before mortaring so the soft brick will not suck the water out of the mortar too fast and not stick.
Looking back, the brick-laying in the first few rows is not near as good as what I'm doing now. And I'm sure I'll get much better.
And this will be my last kiln to build myself - it is a lot of work!

Friday, September 11, 2009

Susan's New Kiln


Friday, September 11, 2009

I've typed my first blog, and rereading, I find it quite technical. Ok, it is my kiln-building diary. Will try to lighten things up next blog.

I've wanted a wood-fired kiln for a long time. My gas-fired kiln is 25 years old, and the floor was starting to fall out. After much thought, I decided to tear down my (then) existing gas kiln and rebuild on the same spot. There should be no reason the entire project could not be completed during the summer. Well, there is now 10 days left in summer, and the new kiln is not quite half done. Actually less than half done. Of course, I can't give up now - so I stumble forward.

I would never have attempted this project without the complete support of my kiln guru and master kiln-builder: Howard Kiefer. I told him from the start: I want your brain, not your body.
And he's been very generous teaching a beginner to be a bricklayer & kiln designer.
I'm quite confident the kiln will fire well - but then Howard gets alot of the credit.

I've been taking digital pictures of this project as I go along. Often to email Howard of my progress, and ask his advise about a particular problem.
Since I'm just now starting the blog I've been contemplating for awhile, I will slip in the beginning parts of kiln building as I go along.

I've learned so many tidbits of kilns, bricks, kiln design, and much more. Will share as I think of things. I've been accumulating materials - hard bricks - for a number of years. The date of my first bucket of mortar was 1997 - so it's taken awhile for the right time to come about.
Last fall, a fellow potter mentioned he had a number of hard bricks that he was willing to part with. My first trip was to check out the bricks and bring 40 or so home in my Honda. At over 8.5# per hard brick, that was more than 300 pounds. I called around and priced new bricks; delivery alone was not going to be inexpensive. It took over 6 months to coordinate a vehicle to move bricks and everyone's schedule. I should have taken this as a warning that things take much longer than anticipated. Even when we planned the brick moving day, it got postponed at the last minute.

* * * * *
First Pic: Old Kiln with door & chimney bricks taken down

Second Pic: First row of bricks of the foundation - This is hard bricks with soft bricks at each end - the soft bricks are insulation. Three rows of foundation bricks were used. Bottom is hard bricks, middle is soft bricks, upper row is hard brick floor of the kiln.
I had concrete under my old kiln, but needed more square footage. Had to raise the level of the old kiln foundation with cinder blocks to raise it up. Layed hardibacker over the cinder blocks to level, and another sheet of hardibacker to insulate the concrete from the firebricks.

* * * * *
I opened a new bucket of mortar today. It was so thick, I phoned the manufacturer to find if I could add water to desired consistency without ruining it. Was told to put some of the mortar in another bucket (used about half a 50# bucket of mortar) (I'll ruin another good bucket), add water then mix. Used about half my mixed mortar to level the soft bricks around the inner hard bricks. Then mortared the 11th row of bricks - ran out of mortar 2 bricks short. Will do them next time - possibly tomorrow.