Saturday, October 31, 2009

Bricking up top front of the kiln


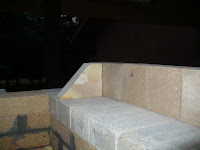
I just like the photo on the right. This is the inside of the arch, unmortared, staying in place with the pressure of the corner angle-irons & skewback bricks holding tight.

The left photo shows the front of the kiln bricked up to cover the arch. I did this on Thursday, Oct 29. On Friday, I mocked up the rest of the back wall, but found I needed one brick cut to fit on the first row above the bottom of the arch. I was at a stop point, so decided to measure for sheet metal to cover the upper bricks on front, back & side of the kiln. Friday afternoon, I headed to town & the sun broke out, bummer for me. I'd worked outside on Thursday in very cold and damp weather. Friday was a bit warmer, but the sun didn't come out until I was heading into town. I could think of so many things to do at the ranch in the warm afternoon sun, but would miss out on for that day.

Anyway, I went first to where I had rented the brick cutter so see if they would cut one brick for me. Lucky for me, there was no problem and it only took minutes. I made sure to mention that I needed to rent that tool for another full day.

Onto Umpqua Sheet Metal, where I took a small piece of sheet metal, and ordered 2 larger pieces, all to be folded & cut to order. I requested a quote on a stainless steel chimney cap. Didn't realize how specialized chimney caps were, as the man I talked to sketched 3 or 4 different styles of chimney caps. I'm just trying to get a ballpark estimate of how much more money I need to set aside.

The last time Howard was here, he showed me how to guesstimate how many more bricks I will need for the chimney. I counted up all the remaining bricks, those still to have old mortar ground off, and those that need to be mortared back together. Including everything, it will be nip & tuck to have enough bricks to build the chimney through the roof over the kiln. I'll see how many bricks I use this next week, as the chimney will be on the schedule in the next couple of days. At least I won't have to concern myself with picking up odds & ends of left over bricks...

Friday, October 30, 2009

More Kiln Supplies

On Wednesday I went shopping in Portland for kiln supplies:

I needed another box of kaowool (the spun alumina, hi-temp insulation). Howard had suggested I get 2" thick instead of the usual 1". The door & above the arch would benefit from the extra insulation. I have been contemplating rebuilding my raku kiln (since I'm rebuilding kilns, anyway) and that requires 2" of insulation, also. That should just about use an entire 2' x 25' roll of 2" thick kaowool.

The dampers on the chimney will have a lintel brick (13.5" x 4.5" x 2.5" instead of the regular 9" x 4.5" x 2.5") above them. The longer lintel will straddle the 9" wide damper, for strong chimney support. I had 1 lintel remaining and, though I only need 2, wanted to get 2 more (they don't cost that much & I would have one for a spare - just in case I need it). Jeff, at Hi-Temp NW, where I get kaowool and mortar, just happened to get some lintels in the afternoon before I came. Apparently, I wasn't the only one requesting such bricks. Even better, I was saved a trip across Portland to a far suburb where another brick supplier is located.

Next stop was Georgie's, the Pottery supply store. They had kiln furniture on sale in October, and it was getting late in the month to get my discount. I had one old damper, a 9" x 20" piece of mullite kiln shelf. I need 2 of these for the new kiln. By phoning ahead, I learned I could get a 20" x 20" kiln shelf cut into 2 pieces with a small strip left over. Again, I want to have a spare damper, and I can cut the left over strip into pieces I will use.

Thursday, October 29, 2009

The Arch Has Sprung!


See: I can stand up in my new kiln - with my boots on, too!

This was absolutely amazing - to watch the arch actually spring from the arch support (where was my camera at that time?).
Howard & I added bricks to the arch one at a time from each side.
When we got to the last row, front-to-back, it was arch bricks (which are larger on one side than the other, so they will turn a circle).
This center brick is called a "key" brick, because it 'keys in' the arch.

Well, we put the key bricks in from front to back, and they only went in 1.5" of 4.5". I kept wondering how we would get them in all the way. Wouldn't we lift the wooden arch support holding the bricks up? We could lift it up just a fraction of an inch and have quite a bit more space on the top of the arch. No, it could lift the brick resting on the wall, which we really would not want.

What Howard did was to slowly tap the bricks in. He went from front to back many many times. The bricks kept going in further, a little bit at a time. As they moved, he started pounding the bricks - the arch support was holding firm. He pounded and pounded away. He pounded on all the bricks in the arch, not just the key bricks. As the key bricks got closer to all the way in, the arch started to spring from the wood form. It started at the sides of the arch, nearest where the arch sits on the side walls (actually the arch is supported by the skewback bricks, those cut at an angle).

When the key bricks, in the center of the arch, were all the way pounded in, the arch bricks sat just above the arch. H went under the arch, into the kiln. He carefully tapped the 2" x 6" pieces of lumber that were holding the arch support in place. One corner at a time the wood support fell away, and the arch bricks held. Of course, I was holding my breath. H was confident, as he has build many kilns over the years.

Then we took some photos and broke for lunch.

I have a lot of bricks to mortar now. The front & back walls need to be built to cover the arch support, then insulation on the top of the walls & the arch. Finally, the chimney will be mortared. We did a quick calculation of how many bricks will be needed for the chimney & how many bricks are left. It looks like every brick will be used. I'll have to count more carefully, and determine just how many more will be needed.

Monday, October 26, 2009

Real progress


There was a lot of progress made on the kiln today. I've been preparing many pieces and parts, and it was gratifying to see them go up smoothly.

First the angle iron went up. Howard drilled holes into the concrete through flaps on the bottom of each vertical post. The posts are then bolted onto the ground. Stainless steel tie rods were added at the top of each angle iron to stabilize the tops as well as the bottoms. We added valve springs onto the tie rods on top to absorb the expansion of the arch when the kiln is at its hottest.

As we erected the vertical irons, sheet metal with kaowool insulation adhered to it, was slipped into postion. The kaowool is spun alumina, a space-age insulation product that works best when it is not compressed. I had the sheet metal edges folded in a z-shape, so the sides would fit under the angle iron, and the center pooch out to give space for the insulation.

The first photo is the front of the kiln where you can see the wooden arch support above the sheet metal. A close examination shows 8 rows of bricks on each side of the arch support. There are another 11 rows of bricks to be added in the middle/top of the arch. When all the bricks are on the arch support, it is carefully lowered just a fraction of an inch to make sure nothing falls. There is no mortar on the arch bricks or skewbacks, they are held in position by the shape of the arch. Angle iron & tie rods keep the arch bricks from spreading or falling. When we are confident the arch is holding (of course, it will!) the wooden support will be removed from the kiln.

On the left side of the kiln front you can see the white kaowool insulation through holes in the sheet metal. The upper hole will be cut out to reveal the opening where wood can be stoked, and the lower hole will be for a propane burner. There are similar holes in the sheet metal on the back wall. You can see them on the second (right side) photo. The back of the kiln can be seen on the left and the firebox side is on the right of the photo on the right side above. Holes on the far side of the back wall are peep holes, which when opened will allow me to check the heat rise during a firing. The holes on the bottom of the firebox side walls are called "mouse" holes. When these are opened during a firing, they will allow fresh air (more oxygen) to enter the firebox. This would be to encourage a hotter wood fire, when that is the fuel being used.

After the arch bricks are set, I get to go back to mortaring bricks on the front & back walls. My supply of good hot-face bricks is getting very low. I'm trying to use the better looking (newer, less chips or gouges) bricks in the main kiln, where it will get hottest. The chimney can take any left over, old, cracked, chipped or otherwise compromised bricks, and it will not affect the way the kiln fires. I have a number of old soft bricks that I'm planning on using to insulate the chimney until I run out of them. We'll see how much of the chimney will get insulated this way.

Sunday, October 25, 2009

No pics today - or yesterday. It was a frustrating weekend for kiln-building.
I did grind the edges of all the skewback bricks that the brick saw missed. And the extra skewbacks, a total of 40 that had their edges trimmed.

I started to mortar the chimney bricks that I had taken down in order. After I mortared the base of the chimney - which had never been done - I found that my measurements were off.
What I found was that in my haste to mock up the chimney and cut bricks last Monday, I had not measured accurately. In fact, the cut bricks for the chimney varied from front to back of the chimney on most every row. A real bricklayer would have noticed this discrepancy immediately, and gone back and remeasured until it was correct. But not me! My amateurish bricklaying techniques had to show through with flying colors.

When I restacked the chimney - this weekend - I found 15 - 20 bricks that have to be recut. I suppose this is a postive aspect of my bonehead bricklaying: the bricks need to be cut more rather than being too small. Since one cannot glue on another 3/4" or so if a brick was cut too short.
I would like to cut a few more hard bricks to use as posts when stacking the kiln. Assuming there are extra hard bricks after the chimney is done. The quantity of bricks is going down very fast, and I sure hope I don't have to put out a call for the last 20 or so bricks...

My frustration came from the fact that I cannot lift the brickcutting machine. I need a strong, able-bodied person to help lift & set-up the brick cutter from my rig. Then I need the same individual to assist in lifting the brick cutter back into my truck. I was able to get ahold of my hired kid to help out last Monday, but I need enough work to keep him occupied while I keep him here. You don't just call someone out to work for 10 minutes, then let them go until 7 hours later. Frustration. It will work out in a week or so, I will have someone here to help me lift such heavy items.

Tomorrow, Howard is coming over early to set the angle iron on the corners and start the arch.
Progress will step up in pace - I expect...

Tuesday, October 20, 2009


Lots of photos today.

We'll work in reverse: last pic is angle iron braces that have been painted with primer - to protect them from rust. The iron pieces are from my old kiln and nearly 30 years old, I'm figuring they need all the help they can get to stay strong. (Vitamins for iron!) These 2 make 6 of 8 iron pieces to get primer'd. The door has yet to be fabricated.

On the right are the arch supports for the old & new kilns of mine. The old kiln used the smaller one. The larger arch support has to include the firebox in the new kiln. Also, in a wood-fueled kiln the shelves are spaced farther apart to facilitate movement & distribution of ashes from firebox to flue.

The first 2 photos are the chimney dismantled. Each row of chimney bricks is in it's own stack, in order that they were taken down. I wanted the stacks to be out of the predicted rain for tonight. It may take me a few days to mortar the chimney back up.

I did start mortaring the chimney, and found I had to move loose bricks down to the 3rd row of foundation. I had not mortared the chimney area at all! When I put the level on the bricks, they were very out of alignment. Who the heck set the foundation & mortared those first rows?? All the more evidence of how much better of a bricklayer I am now. And the 4-foot level I am using sure helps to keep the rows even. Claude gave me this level after I started setting rows of bricks for the walls. He noticed the challenges I had using a 2-foot level, in keeping my rows even. I now recommend no person attempt a kiln-building project without a 4-foot level.

Late this afternoon (5:30pm, the sun was down, the days are getting much shorter) I quit mortaring the chimney at the first corbel-in row. I set the bricks dry & found they were very tight. I'll have to make some adjustments in the brick positions as I go up the chimney. Yesterday, when we dry set the chimney & cut bricks, it was at a good pace. Now I am carefully measuring & mortaring bricks. I rented the brick saw for just one day, and do not have the luxury of having one on hand everyday. Thus, I will make adjustments as the bricks get set, and not concern myself with having everything look "pretty". This kiln is a tool and it will have the requirements to produce great looking pots. It is not intended to be a showpiece as a work of perfect craftmanship in itself - that would be the position of a professional kiln builder. (Though it will be a feat of accomplishment, if I do say so myself.)

Monday, October 19, 2009

Brick Cutting Day


After some early morning rain, no more was expected, so I picked up the brick cutter I had reserved at a local rental place.

I was able to get a hold of my hired young man, Paul, who came over this afternoon to cut bricks.

It took us at least an hour to figure out how to set the machine to cut skewbacks at the exact same angle. Claude was in on that part, so it was 3 heads working together. I need 18 on each side, a total of 36. So I had Paul cut at least 40 skewbacks.

Next we went to the chimney, which is not mortared yet, just dry set. I just kept building it up and had to cut 2 bricks per row, as we corbeled in 3/4" per row per side. That means we made each row going up 1.5" less wide than the row below. I think one can figure out what I mean from the photo on the left.
The only (minor) complication was when I dropped a ruler down the chimney. Of course, it was near the end of the day, and the chimney was getting high. Fortunately, we were able to go into the kiln & reach through a flue hole to get it out.

We took a break in the middle of the day to go to Claude's workshop & pick up the arch support he had made. I believe I am ready to lay the arch bricks - as soon as I coordinate schedules with Howard. He may find something else I need to prepare...

My body is so tired & exhausted today. I'll sleep like a rock tonight.

Thursday, October 15, 2009

Peek of the Future


The angle iron is not yet bolted into the cement foundation, but this gives an idea of what it will look like.
The arch will sit on the top bricks, then the front & back will be bricked up so you cannot see the arch from the outside.
Sheet metal will be added above the shown pieces once the arch, and front & back are finished.
Kaowool insulation will sit inside the sheet metal, and peek out the stoke & burner holes pictured on the left side of the doorway.

My neighbor Claude who is a major supporter in this kiln project, gave me a much needed hand today. He held the back piece of sheet metal in place, so I could go inside the kiln and use a marker pen to draw the 4 holes that need to be cut out: the back stoke & burner holes and the bottom 2 peep holes. This is the only way I could think of to get the holes exactly in the correct positions. Tomorrow, on my way to the winery, I will take the piece into town for cutting. Won't be able to pick it up until Monday, but that will be soon enough.

This afternoon, I mixed concrete for the first time ever, and filled cinder block holes on the right side at the base of the angle iron. Mixing concrete was much easier than I thought it would be. Even easier if you use the 'just-add-water' stuff, and only mix 5 pounds at a time.

I also painted primer on the front angle iron pieces. The back pieces were prepped by sanding with steel wool, and will get painted soon.

Almost rented a brick saw this afternoon to cut skewback bricks. But I got a message that I am wanted to mind the tasting room at the winery tomorrow & Saturday.
Next time it isn't raining alot, Monday or Tuesday, I will rent the brick saw. Besides the 36 skewback bricks (and probably a few spares), I want to cut some bricks for the chimney area.
The chimney is at the point where I will corbel in .75" on 2 opposite sides, on each row. This will mean a brick has to be cut on 2 opposite sides that are not corbeled in, because I'm shortening the row by 1.5" (2 x .75" = 1.5").
As soon as there are pictures, it will be clear what I'm talking about.

The kiln is starting to look like a kiln already - just wait til the arch gets on, then it really will.

Tuesday, October 13, 2009

Measuring sheet metal

No photos today. I sanded 4 corners of the soft brick to make it (near-) perfect level.
My arms felt like they would fall off, after 3 hours of vigorous sanding with a hand-held thing that looks like a small cheese grater. I think my brain is fried, I cannot think of this tool's name.

When I place the angle iron on the corners, each corner is now perfectly level on the vertical.
Yesterday afternoon, I took sheet metal pieces for the kiln front in to be pleated. This is so the kaowool will not get squished, and will retain its loft & insulation properties.
I brought the pieces home last night, and remeasured them in the angle iron. After much measuring, figuring and thinking, I decided where they would be cut & the other sides pleated.

Today I also, measured for sheet metal on the left - firebox - side and back of the kiln.
I must be very slow at figuring things out, because it took me quite awhile.
My next kiln would go much faster, and I would be more meticulous in my brick-laying. Then I wouldn't have so many corrections to make later on. But this will be my last kiln to build. It is an incredible amount of work.

I took my measurements and sheet metal back to the sheet metal company and hope they will have my pieces ready later tomorrow. I have yet to measure the back side sheet metal for stoke, burner, & peep holes. I think it will be more accurate after the side pleats are put in.
So I'll keep taking the sheet metal back & forth. To the kiln for measurements, and back to the professionals for cutting.

Tomorrow I'm also thinking of a trip to the pottery supply in Eugene. Need to get sodium silicate, which Howard says will "glue" the kaowool to the sheet metal. That would make it much easier to keep the kaowool in place, so it doesn't slip around when installing the sheet metal.
And I can pick up some clay while I'm there.

Progress is snailing along again, but I will stay optimistic that things will move faster soon enough. It is the prep work that takes all the time.

Sunday, October 11, 2009

Angle Iron Verticals


The welder did a great job fabricating the corner angle iron pieces. I need to shave the soft brick corners so there are no protrusions. Thought I had done it, but not good enough. When the angle iron fits snug, and is perfectly vertical, it will eventually be bolted into the concrete foundation below.

The next step, before the arch, is to super-insulate the side walls. One inch of Kaowool, a spun alumina space-age insulation blanket will back all the brickwork. The Kaowool will be held in place with sheet metal. I have some pieces of sheet metal left-over from my old kiln. Some of the pieces can be used on the new kiln. Howard phoned this morning with a great idea: When I have the sheet metal cut to fit & holes cut for stoking & burner ports, I should have them pleat the sheet metal. The pleats would be in a Z-shape to fit under the edges of corner angle iron. This way the insulation blanket would not be smooshed, but stay lofty. That is the thing about soft insulation, it needs space to be effective.

Howard & I measured the sheet metal for the front of the kiln on Saturday. It took quite awhile to do this. I want to double check all the measurements before I have the sheet metal cut. And I'll have to bring in my old sheet metal for cutting before I order any new sheet metal, since I do not know what gauge (thickness/strength) it is. This is looking like a few trips to town for the sheet metal.

The photo on the left shows a mock-up of a start of the corbel-in on the chimney. Corbel-in is how the chimney goes from very wide (45" from side-to-side) to desired chimney width of 13.5". I only went a few rows up, then laid a straight-edge along the outside ladder of bricks to see where they will come together. The chimney will be at its desired width at the height of the angle-iron that supports the skewback bricks. I want to figure out the size of sheet metal that will be on the right side wall next to the corbel-in chimney. More figuring...

Rain is in the forecast after one last day of sun. I can always make pots, if I cannot work on the kiln.

Thursday, October 8, 2009

Row 25


It has taken awhile to get this far. Photo on the left is the back wall with part of the left side wall. That is a fluorescent green, 4-foot long level resting on the back wall.
Photo on the right is 4" angle iron (L-shaped) that has bricks set on the iron.
Back 2 blogs, on Sunday, October 4, I posted a photo similar to the one on the right above, but without the angle iron. The photo from Oct 4 also showed a sample of skewback brick which is cut at an angle. The skewback bricks, cut at an angle, will also have to have a notch cut into them to set on the angle iron. It doesn't show in the photo, but the 4" angle iron is holding the 2.25" side of the brick. Therefore over 1" of angle iron sticks out - this is the brown strip seen below the vertical side wall bricks.

The edges of the angle iron had to be ground smooth, I got a sliver in my thumb right away.
Then they were lifted onto the side wall - they were so-o heavy!
Each brick that is sitting on the angle iron had to have one edge ground down. Because the bricks have sharp corners, and the angle iron has a rounded corner.

Howard says I want to make a wooden box to put a brick into so I can cut the skewback angle the same for all 36 bricks that will be used. Makes sense to me. Sounds like the best way to get the exact same cut on each brick.

The top row on the back wall is not yet mortared. I'm checking to see if I set the arch up to the already mortared back wall, or I brick up the back wall to the already set arch.
I'm thinking the former is the best idea: mortar the back wall, then set the arch against the wall.
I'm planning on mortaring the front wall to fit against the already set arch. Seems that the bricks have the best chance of fitting snuggest that way.
Hard to think of bricks being snug, but the word seemed to fit.
One more day at the winery, then Howard comes over on Saturday with the first installment of angle iron.
I'm excited. There will be big changes to see then.

Wednesday, October 7, 2009

Shopping for Metal Supplies: Tie Rods and Valve Springs

Monday morning Howard brought Steve, his welder friend, over to see the kiln.
It was so-o-o cold, about 38 degrees F. I must have been wearing 5 layers of clothes.
Such a change from the 100 degree weather of just a few weeks ago.
Anyway, much discussion and measuring occurred. They were there just over an hour - in that weather, decisions get made fast.

That afternoon, my husband took a truckload of angle-iron pieces from my old kiln over to Howard's then to Steve's for reassembling.
I went to a near-byl town to pick up more angle-iron, in another size.
And consulted with Dave, my local car mechanic, about valve springs. Howard had said to find "valve springs" that would go on expansion rods above the top of the kiln. Dave told me that 20 years ago he would have buckets of them around, but no more. Nowdays he replaces more parts on cars that he used to repair. But he did tell me where to look for them.

Tuesday morning was even colder: 36 degrees, (there goes the basil in the garden).
So I drove to the next larger town for more metal supplies.
I phoned first, and got a quote of $1 each, for used valve springs. Not too bad, I figured, since I was advised that new ones run about $10 each. When I got to the shop, the man I had spoken to was out, and luckily another had heard I would stop by. He picked out my 8 used springs, and threw in a few more for good luck. I offered a large porcelain mug instead of cash, and after a moment deliberation, he went for it.
Monday had been a tough day for me mentally - hey it happens to lots of us - and Tuesday was looking up already.

Wednesday I got lots done at the kiln site, and took lots of pictures.
But, I forgot my camera at the studio, so will talk about today's progress tomorrow.
Since tomorrow, I will be at my part-time job pouring wine at the Winery tasting room down the road & on Friday.
This way, I will have something to blog tomorrow.
Progress is coming...

Sunday, October 4, 2009

Skewback bricks


The grey bricks laid on end here are the 24th row. They are arranged in what is called "soldier" bricks. Skewback bricks are cut to fit on the grey, "soldier-laid" bricks. The angle side of each skewback will support the arch, as it lies across the kiln from left to right/right to left. 18 skewbacks will be cut to fit on each side of the kiln.
Pictured is the left side wall, the firebox side of the kiln.
The 2 pics on the right were taken from the inside of the kiln.
The angle-cut brick is a sample of skewback. These are custom for every kiln. There used to be sold skewbacks made from hard brick. While particular angle-cut skewbacks, often 45 degrees, may still be made, a brick company in Portland offered to sell me castable to make 1 large custom skewback to fit each side of the kiln. To support the arch. They said this is how things are done more often, now.

The photo on the left is on the right side of the kiln, the chimney side.
The bricks that are vertical on the top row will back up the skewbacks.
The vertical bricks will also be supported by angle iron.
The horizontally running iron angle will then be supported by vertical angle irons on each corner.
Harder to explain, will be able to show this soon, I hope.

Tomorrow morning, Howard, kiln guru extraordinaire, will bring by Steve, his neighbor & angle iron "Man". I have questions of what pieces from my old kiln are really usable.
And how will angle iron supporting the stoke holes & kiln door be designed.

Stay tuned....

Thursday, October 1, 2009

24th row

For this kiln the 24th row is where the skewbacks will sit to support the arch.
Before the arch goes up, angle iron needs to be on each corner, and on the top row pictured. The angle iron on the top row will be on each side, and it will support the arch. So when the kiln is heated, the arch will expand up and not out.
I have a quantity of angle iron from my old kiln. The old soft brick kiln was held together with many lengths of angle iron. It has been cut into lengths and many of the old pieces will be able to be used in this kiln. The longest lengths needed will have to be purchased (of course).

Here are some mortar qualities that I have learned:
I like using mortar is a sort of soupy consistency. When I purchase mortar it is in a trowel-ready consistency. I trowel about 1/3 to 1/4th of a bucket of mortar into a separate bucket & add water to near soupy consistency. In the very hot weather - I've been working in the summer heat waves of 100 degrees F + which is conducive to more liquid mortar - the hot air dries the mortar quickly. The last couple of days have cooled off dramatically. I can use a touch stiffer mortar on the hard bricks.
The hot face bricks on the inside of the kiln are hard bricks and absorb little water from the mortar. The back-up bricks on the outside of the kiln are soft bricks, and are held in water ( the half of the brick that will be mortared is immersed) just before being mortared. This way the porous brick does not absorb too much water from the mortar & dry it out before it is properly set.